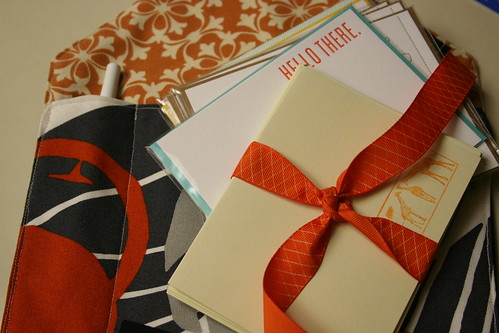
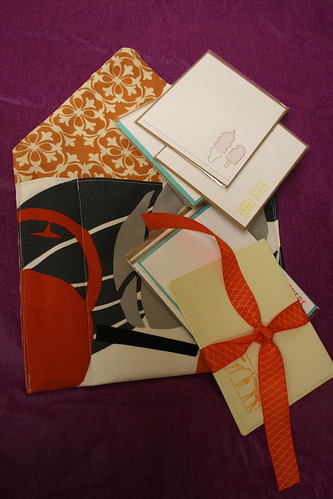
What to do with those handmade cards you buy at the local coffee shop? Or order from Paper Source? Or buy in bulk from Etsy? (Or perhaps my favorite new local shop: See SawDesigns. Hello, adorable letterpress creations!)
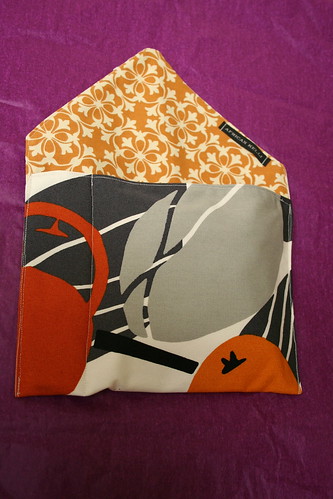
How about a fabric correspondence envelope, with space for both your cards, stamps and your favorite pen? You could use this to clean up your stationery drawer, or throw it in your suitcase when you travel to keep postcards and an address book handy.
{Yes, I actually travel like this. And yes, if you are in my address book, you’ve more than likely received your fair dose of correspondence over the years.}
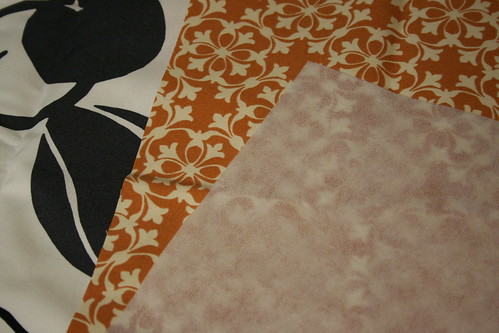
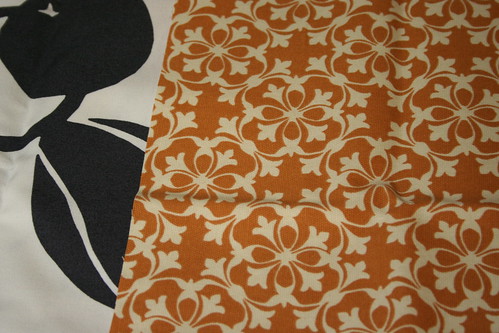
Let’s start with fabric selection. Pick two pieces of fabric that are decor weight to give this some heft.
Supplies:
– 2 pieces of decor weight fabric, interior 10 ” x 14 ”
– 2 pieces of decor weight fabric, exterior 10 ” x 7″
– 2 pieces of lightweight fusible interfacing, one, 10″ x 14″; the other 10″ x 7″
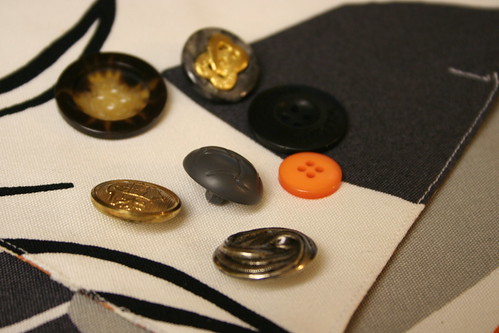
– 1 fabulous button, with needle and thread to attach
– general sewing notions: scissors, machine, ruler, pencil, etc.
Directions:
All seams are 1/2 inch.
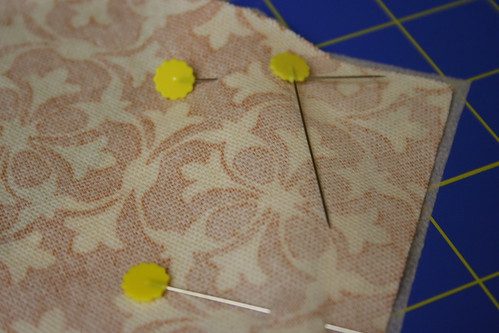
Cut your exterior and interior pieces, along with your interfacing. Iron the interfacing to the wrong side of your exterior pieces. Place the exteriors (with interfacing now attached) and interior right sides together. You’ll have two stacks. The 10″ side is the bottom. The 14″/7″ side is the height.
Now, we are going to cut the larger set of pieces to make the point of the envelope. Pin the 10″ x 14″ exterior and interior piece together. Use a ruler and a dull pencil and measure 7″ from the bottom of the sandwiched pieces. The wrong side of the either the exterior or the interior should be facing up. Draw a line across the 10″ width at the 7″ (from the bottom up) mark. Now, draw a line from top to bottom at the 5″ mark. You should have two lightly drawn lines across one piece of your fabric.
Starting at the left corner of the 7″ mark and the left-side of the fabric, gently draw a line to the top 5″ mark, creating one side of the envelope point. Repeat on the other side of the fabric, creating the other side. You’ve now drawn a perfect triangle. Trim your envelope pieces accordingly:
You started with rectangles.
Now you have four pieces, two with a triangle top.
Let’s sew these pieces together. As per most sewing patterns, the key is to always sew things right sides together and leave a hole so you can turn it right-side out when you are done. Starting with the smaller 10″ x & 7″ pieces, place right sides together and sew only the top edge closed. (see the above photo) Press with your iron, turn right-side out, repeat seam with a top stitch.
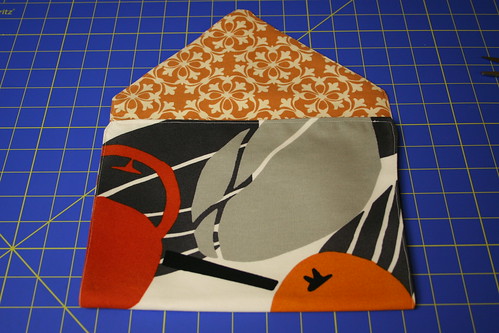
Now, leaving a 3″ hole along the bottom 10″ piece — we are going sew the envelope portion together. Place the 10″ x 14″ (pointy envelope) exterior piece and interior pieces right-sides together. Sew along the outer edge, leaving the 3″ hole along the bottom. Place the other two pieces (10″ x 7″) right-sides together and repeat, leaving the same hole. Clip the corners. Turn both sets right sides out. Using your iron, push out your seams as far as you can. Match up both sets of fabric along the bottom edge (both with 3″ holes). Carefully turn these in and pin. Pin around the entire outer edge of the envelope and top stitch, enclosing your 3″ turning holes. You should now have one giant envelope.
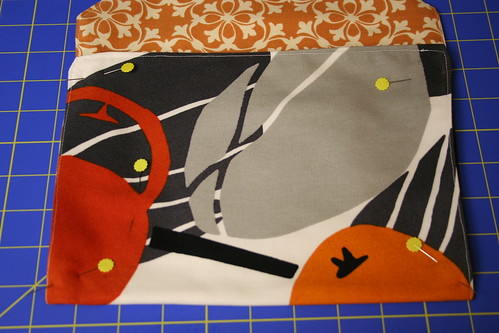
To create pockets for the pen and cards, measure in 2″ from the left-hand edge of your fabric. Run a seam from the bottom to the top of the pocket section (only 7″ tall, not the entire 14″ triangle point!). You’ve now got one large pocket — on the right — for cards and stamps, and one little pocket — on the left, for your pen.
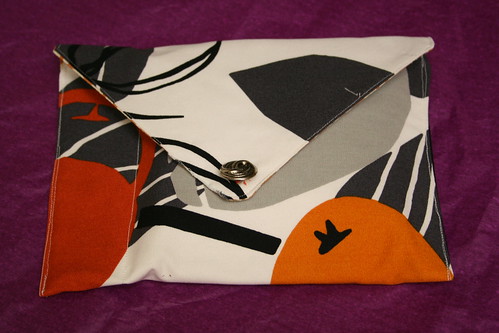
Now, pick a coordinating button to sew on the front of the flap. This is simply for decoration, and to provide a bit of weight to keep the flap down. You won’t create a button hole, so your button doesn’t need to be practical. Go wild!
Add a personal label if you’d like, fill with stationery and a pen and enjoy!
Yay! Letters! Who doesn’t love letters (especially love letters)!
-k