Advent begins today, some 26 days before Christmas. I don’t remember ever celebrating advent with any great fanfare as a child, but have coveted intricate and beautiful advent calendar traditions during the last few years. I am particularly fond of this calendar and this homemade version. {How amazing would it be to receive a sweet note each day?}
This season means different things to Christians. For me, it is a great time to prepare. It provides 26 days to find reasons to be thankful, be mindful in prayer, and to get my heart and home ready for the Christmas season. Cheesy? A bit. Truthful? Definitely. I am a sentimental girl.
I didn’t participate in Black Friday this year and don’t plan on buying a thing for Cyber Monday either. The older I get, the less the stuff seems to matter. I don’t need a thing. Most in my life are equally blessed. And let’s be honest — all you need is a $.50 newspaper to be reminded the most important things in life cannot be purchased or wrapped — love, fidelity, health, sanity, peace. The very last thing I needed this weekend was to sacrifice sleep for the celebration of consumer gluttony. (If I want to celebrate gluttony, I prefer to do so in the comfort of my own home with a piece of pizza in one hand and bottle of wine in the other.)
Instead, my list of handmade items is long and my list of tiny intentional acts of beauty is longer. This year, I’m celebrating Christmas with Christ in mind — He who fed the poor, spent time with the lepers, advocated for love and peace. Needless to say, I’ve got a lot to learn.
I’ll be posting a project each day for the next 26 days. Some take considerable time, while others are conquered within minutes. I hope there will be something included that strikes your fancy. I wish you and your loved ones a holiday season abundant with the very best of life!
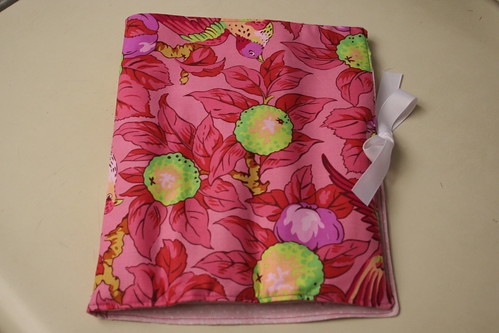
Adventathon: 1 Children’s Art Portfolio Tutorial
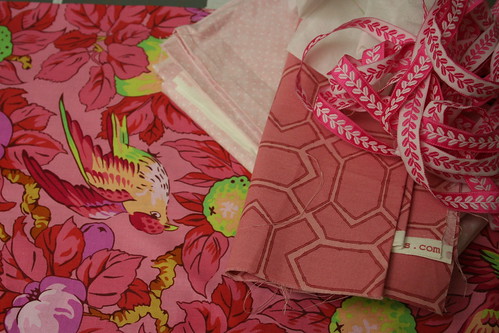
Supplies needed:
- Exterior fabric 18″ x 11″
- Interior fabric 18″ x 11″
- Interfacing 18″ x 11″
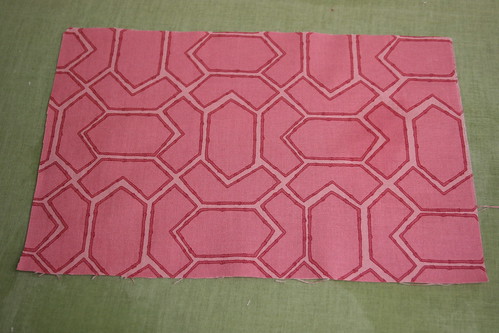
- Interior crayon/marker pocket fabric 7″ x 8″
- Two pieces of ribbon, each 10″ long
- Wax paper
- Art supplies
Directions: Iron all fabrics. Iron/sew interfacing to wrong side of exterior fabric. Set aside.
Take interior pocket material and iron under top (7″) edge, 1/4″.
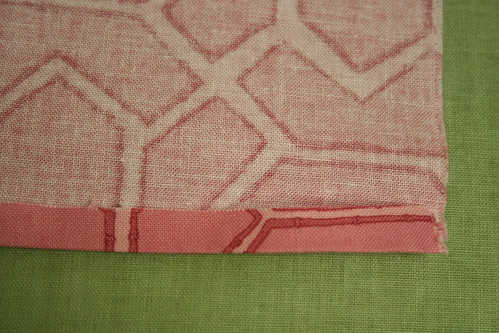
Repeat, ironing same seam again under another1/4″, hiding raw edge.
Repeat with right-hand (8″) edge of pocket. Top stitch top seam.

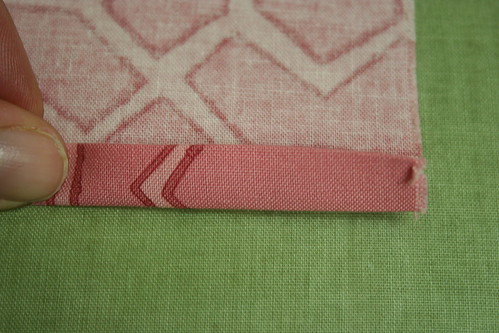
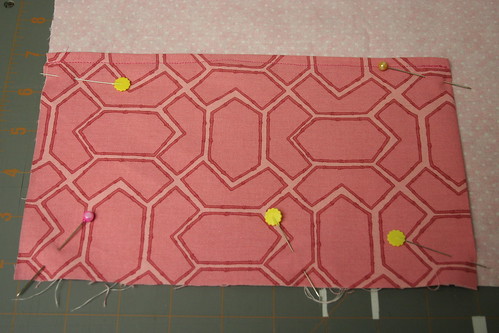
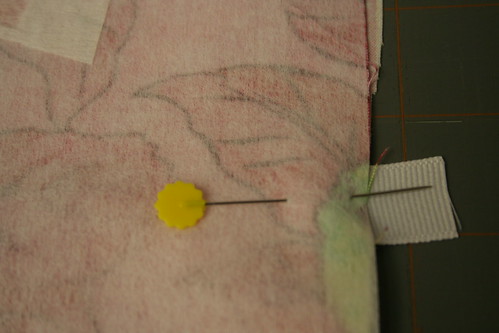
Iron center crease on right side of interior fabric. Align the folded under right-hand edge with the center crease of the interior material:
Pin down pocket side edges and bottom. Stitch 1/4″ from edge of pocket material securing pocket to interior fabric. Do not sew down top edge you’ve already hemmed.
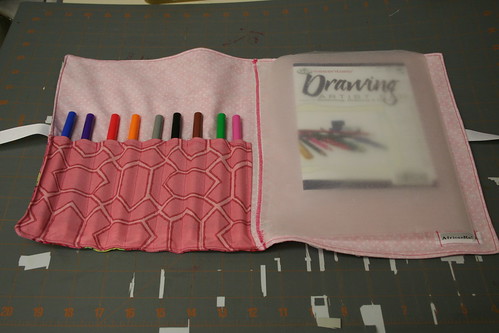
Now, pull out your markers, crayons, pencils, paint brushes or whatever art supply you’d like to gift in this porfolio. Measure the width of these items. We are going to create a series of pockets for each of these by running hems from the top of this pocket to the bottom, backstitching at each end.
I created 8 of these lines, measured equally across the pocket, to hold a packet of markers.
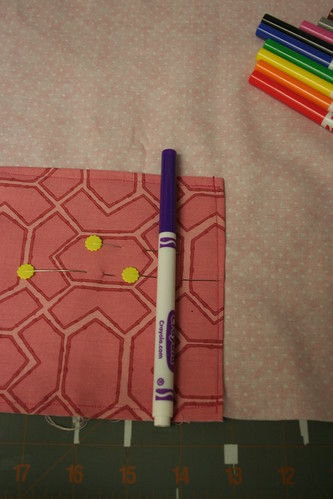
Now, measure the drawing pad you’d like to include on the other side of the interior fabric.
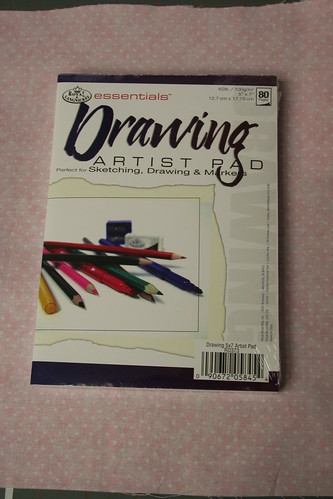
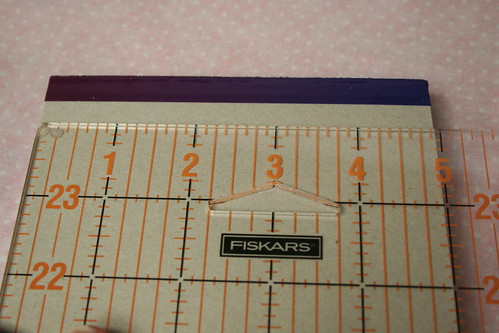
Find the center of the right-hand side of your interior fabric, 3-4″ from the top edge. Draw a line measuring the length of your drawing pad, adding 1/2″. This pad was nearly 5″ – so my line was 5.5″.
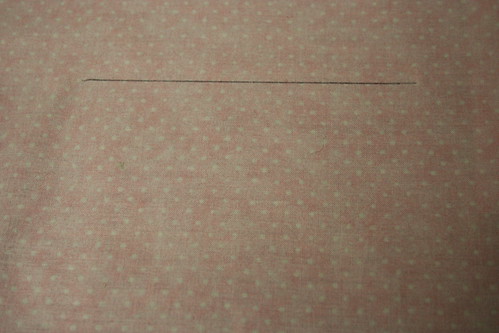
Very carefully, snip this line open with a pair of scissors.

Tuck the back cardboard edge of your drawing pad into this hole to make sure it fits. If it doesn’t, make the hole a bit bigger on either side.
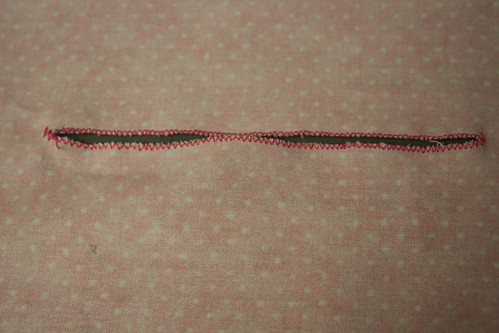
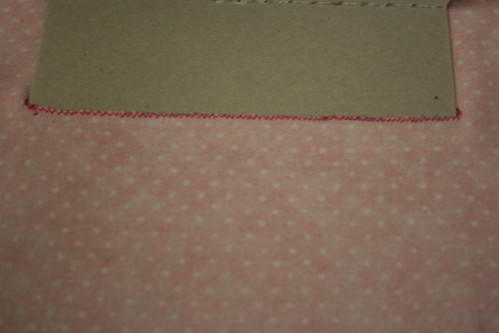
Now hem a small zigzag stitch in a coordinating thread around the hole (buttonhole stitch) to close the raw edge.
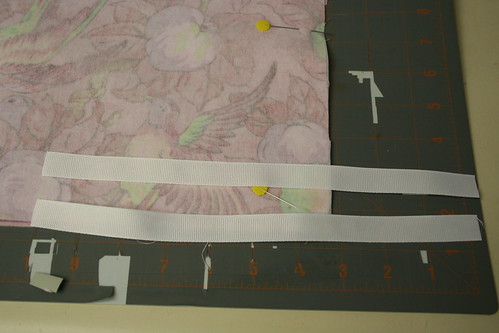
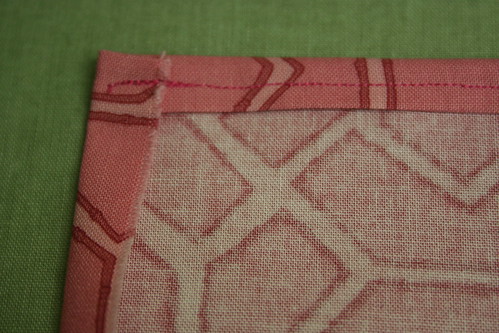
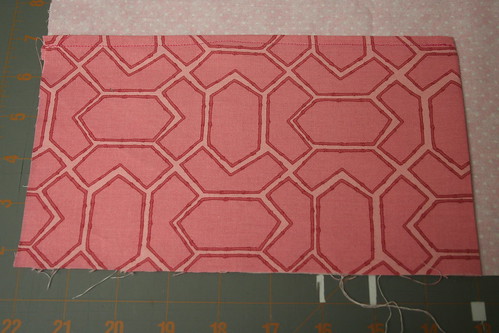
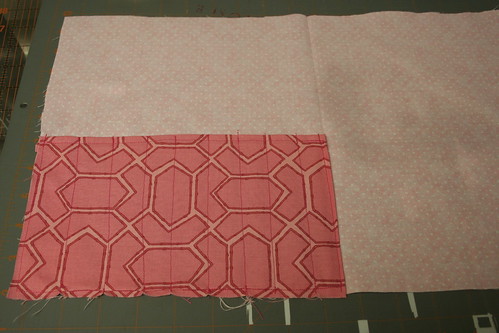
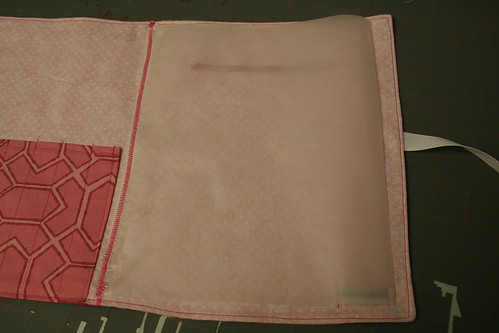
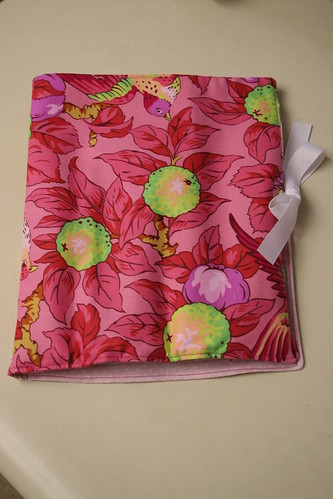
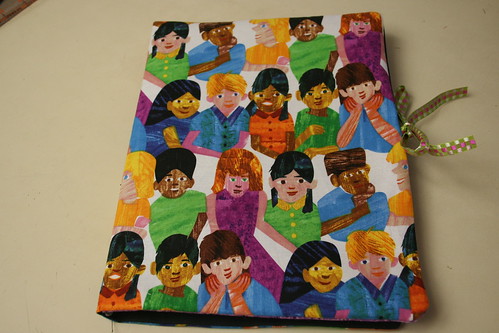
Place the exterior fabric — with interfacing already attached — on top of the interior fabric with right sides matched.
Measure 6.5 inches from the top of the left and right hand sides of the portfolio and tuck your pieces of ribbon between the exterior and interior pieces, leaving at least .5″ outside to pin and later stitch. Sew both sides together with a 1/2″ seam. No need to leave a hole to turn right sides out. Clip the corners, trim any excess including that extra bit of ribbon and then pull the right sides through your drawing pad hole. Iron flat, pushing out the corners carefully. Top stitch in a coordinating thread.
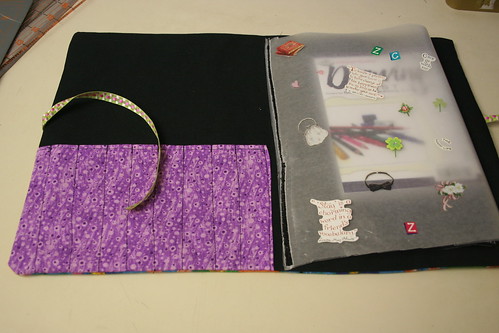
Now, measure several pieces of wax paper to place in the center of the portfolio for stamps/stickers. Carefully run a tight zigzag stitch down the left-hand side of the wax paper to secure to the portfolio. This also creates a center binding for the portfolio because you are stitching through all three layers (make sure your bobbin thread matches your exterior fabric.) This step is entirely optional. Wax paper doesn’t hold up well and if your artist is too old for stickers, skip it.
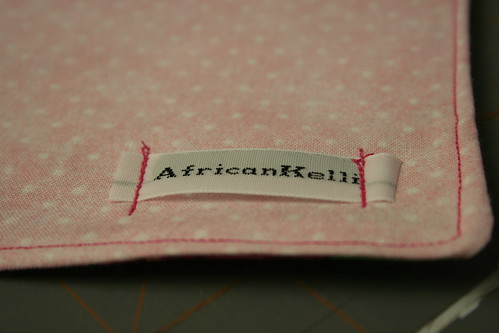
Add a label if you’d like.
Place the drawing pad in the hole by securing the back cover.
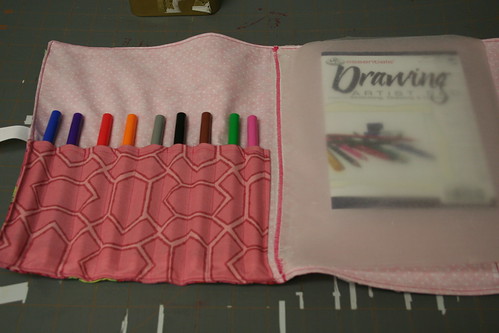
Add your art supplies

And stickers
Voila — a children’s art portfolio.
Other variations may include thank you notes, stamps, stationery, etc.
Tomorrow: a favorite holiday recipe
~K